 Adobe Community
- Home
- Photoshop ecosystem
- Discussions
- CS4 Lasso Tool and Content Aware Fill
- CS4 Lasso Tool and Content Aware Fill
Copy link to clipboard
Copied
I saw this performed by Moose Petersen to duplicate
and fill an area to expand an image. He used the Lasso tool to enclose the area (now vacant) that he wanted to fill with the exact contents on the edge of the image.
I have been unable to reconstruct his process.
Can someone offer step by step help to accomplish this? Wish to fill the right side to make size 16x20.
Thanks!
Dan


 1 Correct answer
Here, I'll be a bit more specific. Do things in exactly this order:
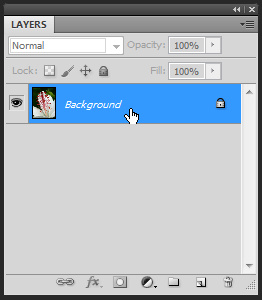
>1. Make the image a layer (not Background).
To do this, make the LAYERS panel visible, hold down the Alt key, and double-click the Background. It should become Layer 0. If it is not the Background to start with, you can skip this step.
>2. Increase the canvas size to 16 x 20 ratio, opening new space on the right.
Image - Image Size, UNcheck Resample Image, and make the image 20 inches tall. Then Choose Image - Canvas Size, and
Explore related tutorials & articles
 10
Replies
10
10
Replies
10
Copy link to clipboard
Copied
I doubt that he demonstrated Content Aware Fill with Photoshop CS4, but he might have used Content Aware Scale.
1. Make the image a layer (not Background).
2. Increase the canvas size to 16 x 20 ratio, opening new space on the right.
3. Do a rectangular selection excluding most of the red parts. You'll have something like this:

4. Edit - Content Aware Scale and drag the right edge handle to fill the canvas. Voila:

5. Touch up (e.g., lightly blur) any edges that have become noisy because of the operation.
-Noel
Copy link to clipboard
Copied
Thanks Noel! I don't know if he was using CS4 or 5. He did not indicate this in
his webinar(http://www.niksoftware.com/learnmore/usa/index.php/webinars/archives#/-finishing-techniques-using-ni...) nor did he have his tool palete displayed to follow along.
I use CS4 hence the "Subject".
This is exactly what I want and will try later when I have time.
Thanks again!
Dan
PS I will give you the "Helpful Answer" for points.
Dan
Copy link to clipboard
Copied
Noel,
Apparently I am doing something wrong.
My work flow is Image>Canvas size(16x20) now here is the question..you mention a rectangular selection. I must NOT be using the right tool because I do not get the checkerboard fill area and the "Content Aware Scale is "greyed out.
Should I be using the Lasso Tool to make the rect. area?
Dan
Copy link to clipboard
Copied
Also your tutorial inks have disappeared.
Copy link to clipboard
Copied
Make sure you have made the image into a layer (double-click the Background in the Layers panel) per step 1, then select the Rectangular Marquee tool from the Tools panel to make that rectangular selection as I showed above:

-Noel
Copy link to clipboard
Copied
The image is already displaying 16
x20 in the "Crop Tool" bar..??
Copy link to clipboard
Copied
You have values in the crop tool options because those values are the last ones you set into the Crop Tool options when you used it last time.
I normally prefer to keep those fields clear, as unexpected resampling can end up happening when you crop. I prefer to set my Image Size and Canvas Size directly via the Image - Image Size and Image - Canvas Size menus.
danpbphoto wrote:
Also your tutorial inks have disappeared.
I'm not sure what you meant by this. I'm accessing the Adobe forum via the web interface: http://forums.adobe.com/message/3736162
-Noel
Copy link to clipboard
Copied
I am having a mental block here Noel.
After I select image>canvas size>new layer> and select Rectangular tool I cannot get the image to view as in yours?
It wont fill the 16x20 rectangle and I can't get the "fill area".
Sorry this is such a chore for me.
I have to leave for an appointment so I will try later.
Thanks!
Dan
Copy link to clipboard
Copied
Here, I'll be a bit more specific. Do things in exactly this order:
>1. Make the image a layer (not Background).
To do this, make the LAYERS panel visible, hold down the Alt key, and double-click the Background. It should become Layer 0. If it is not the Background to start with, you can skip this step.

>2. Increase the canvas size to 16 x 20 ratio, opening new space on the right.
Image - Image Size, UNcheck Resample Image, and make the image 20 inches tall. Then Choose Image - Canvas Size, and expand to the right as follows:


>3. Do a rectangular selection excluding most of the red parts.
You should have, at this point, an image with some checkerboard showing on the right side. Choose the Rectangular Marquee tool as I noted above in post 5 and drag it around the area shown in post 1, including a few of the red parts.
>4. Edit - Content Aware Scale and drag the right edge handle to fill the canvas.
Click Edit - Content Aware Scale from the menu. You'll get a set of little square handles all around the portion of the image that you selected. Grab the one at the right edge and pull to the right, as shown here:

>5. Touch up (e.g., lightly blur) any edges that have become noisy because of the operation.
After the Content Aware Scale operation, I saw that the flower petal edge was a bit rough looking, so I thought it might be a good idea to select the Blur tool and brush over the edge lightly.
-Noel
Copy link to clipboard
Copied
That did it Noel!!!!!!!
I cannot express my appreciation to you for your "undying patience" with me. I am "mentally challenged and intimidated by PS.
Your wonderful step by step "how to" got me there.
One problem was that the "Relative" box was checked in the Canvas Size.
Again..I cannot THANK YOU ENOUGH!!!
My Gratitude!
Dan
PS..will the links in this post stay?? Also I am assuming that when dealing with a "landscape" oriented image that in the Image Size box I would reverse the dimensions to 20x16? Plus how do you determine the "anchor" positioning?

 AdChoices