• Global community
    • Language:
      • Deutsch
      • English
      • Español
      • Français
      • Português
  • 日本語コミュニティ
    Dedicated community for Japanese speakers
  • 한국 커뮤니티
    Dedicated community for Korean speakers
Exit
0

how do you create this dithered pixel effect?

New Here ,
Oct 25, 2012 Oct 25, 2012

Copy link to clipboard

Copied

hey guys really need to figure out how this image was created...

image.jpg

firstly was it done in photoshop? if so with what techniques? i tried using indexed colour in the image>mode, with palette>uniform, dither>pattern but still didnt get the high quality that these guys got. i tried saving as a gif/png with pattern option selected in photoshop and illustrator, still did'nt succeed. Was this done using pixelbender? or some type of plugin? anyhow, really need to figure this out. appreciate any help you guys can provide. thanks.

Views

29.3K

Translate

Translate

Report

Report
Community guidelines
Be kind and respectful, give credit to the original source of content, and search for duplicates before posting. Learn more
community guidelines

correct answers 1 Correct answer

LEGEND , Oct 25, 2012 Oct 25, 2012

It took some experimentation but I was able to emulate that look by working at 400% of final size, and using the Filter - Pixelate - Color Halftone filter applied on a grayscale layer, inverted, and mixed with the underlying layers using Overlay.

ColorHalftoneDemo.jpg

Here's a small part of what the Color Halftone Filter generated at 45 degrees, 6 pixels radius:

Dots.jpg

Here's a PSD file where you can see how I mixed it in detail:

http://Noel.ProDigitalSoftware.com/ForumPosts/ColorHalftoneDemo.psd

-Noel

Votes

Translate

Translate
Adobe
LEGEND ,
Oct 25, 2012 Oct 25, 2012

Copy link to clipboard

Copied

It took some experimentation but I was able to emulate that look by working at 400% of final size, and using the Filter - Pixelate - Color Halftone filter applied on a grayscale layer, inverted, and mixed with the underlying layers using Overlay.

ColorHalftoneDemo.jpg

Here's a small part of what the Color Halftone Filter generated at 45 degrees, 6 pixels radius:

Dots.jpg

Here's a PSD file where you can see how I mixed it in detail:

http://Noel.ProDigitalSoftware.com/ForumPosts/ColorHalftoneDemo.psd

-Noel

Votes

Translate

Translate

Report

Report
Community guidelines
Be kind and respectful, give credit to the original source of content, and search for duplicates before posting. Learn more
community guidelines
New Here ,
Oct 27, 2012 Oct 27, 2012

Copy link to clipboard

Copied

Hey Noel Carboni and conroy,

Thanks a million! It worked just fine! Your idea of using 2 layers - one in full colour and the other in halftone/dither with Overlay was spot on. I had kept thinking for some reason it was just the one layer when as it turned out, it was 2. Thanks so much for the time and trouble. Much appreciated!!!

Votes

Translate

Translate

Report

Report
Community guidelines
Be kind and respectful, give credit to the original source of content, and search for duplicates before posting. Learn more
community guidelines
New Here ,
Nov 22, 2012 Nov 22, 2012

Copy link to clipboard

Copied

Hey again,

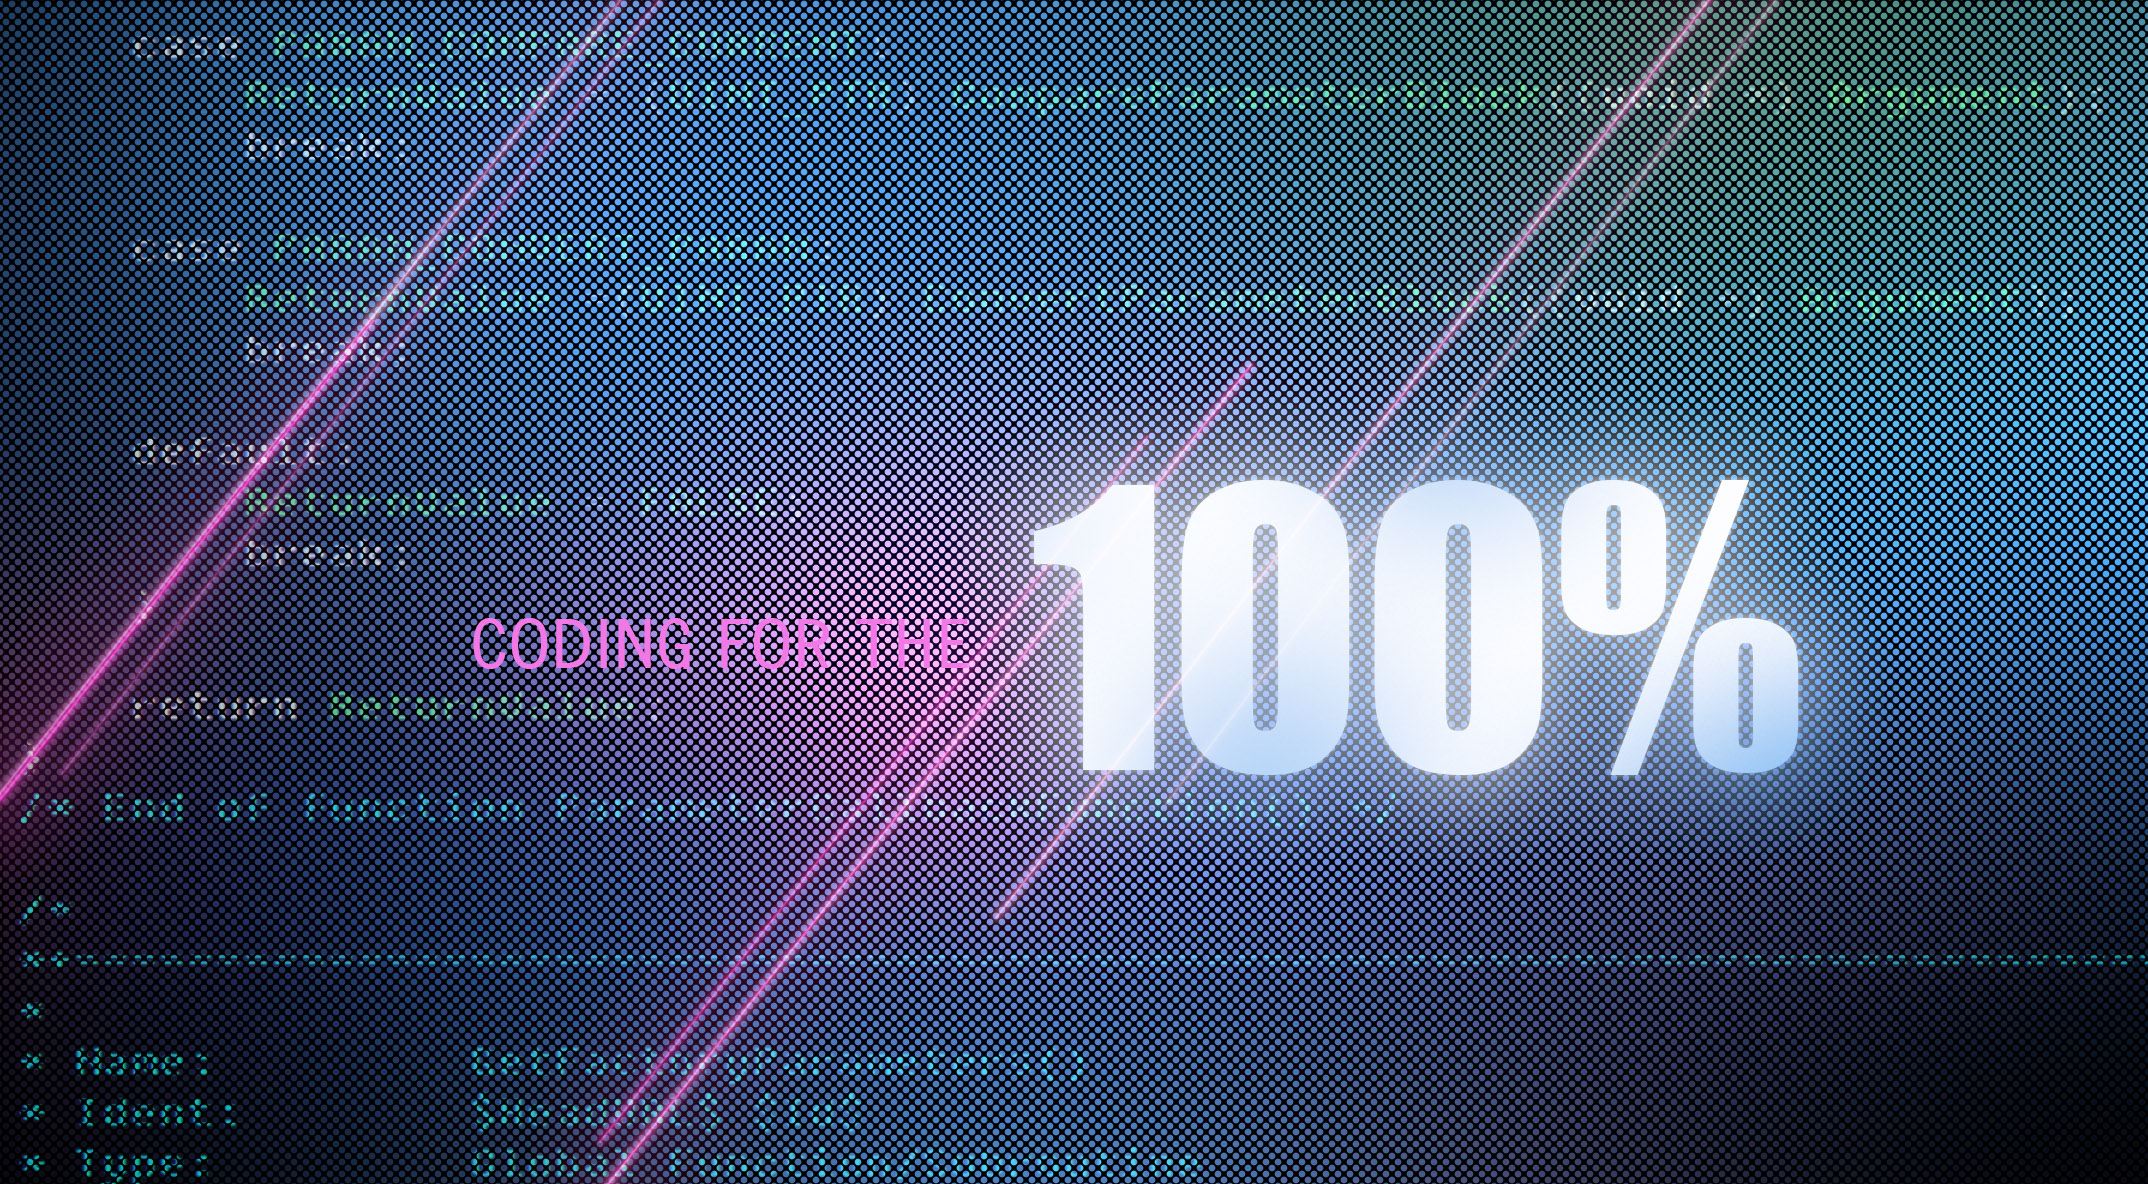
I thought i had everything worked out the first time, though as it now turns out, I did'nt. At the outset, let me just say that the overlay of the upper layer with halftone/dither worked just fine and absolutely no problems there. However, I am having a lot of difficulty in getting the lower layers to look right. The main issue for me is the colour/coloured glow? on the lowest layer and then the layer with code on it.

For the layer with code on it I would really like to get the same colours and style that is used on the Reference image that I uploaded. For that i tried print screening an image of source code from a random website and even a print screen of code on 'style editor' (i am using Firefox). Inverting that print screen layer and/or then adjusting all kinds of settings like hue/saturation, channel mixers, curves, modes, etc. etc. just didnt help. I tried print screening from Dreamweaver-no luck. also tried copying the text and pasting into photoshop and adding lighting effects like blue omni etc...still nothing like the reference image. So i'm stuck there.

Secondly, the Coloured layer(mostly blue)-I'm able to get those thin blue and coloured streaks just fine using a brush with colourdodge mode etc. and blurring. However the main blue 'blur' is still hard to create. I tried filling a separate layer above with blue and then motion blur followed by eraser at the edges but can't for example, get the change in colour of text at the bottom left corner to that burn effect among all the other things(using burn did'nt help). Anyhow to make a long story short...stuck here as well.

Any help you guys can provide will be much appreciated! Thanks again for taking the time to help out.

P.S Please click on the image to see it without forum downsampling.

Votes

Translate

Translate

Report

Report
Community guidelines
Be kind and respectful, give credit to the original source of content, and search for duplicates before posting. Learn more
community guidelines
Valorous Hero ,
Nov 22, 2012 Nov 22, 2012

Copy link to clipboard

Copied

LATEST

the reference image was apparently created using dither pattern. I haven't checked the plug in Conroy suggested but I made a quick try using the dither pattern of the Index Color mode. I  painted with the round soft brush one big blue blob over dark background then converted to index color with a smal number of colors to get more interesting pattern. Then converted back to RGB and used the clone tool to distribute the variations of the pattern randomly on the canvas. The 90% is just a text layer  with outer glow on top of the pattern.

click the image to see it larger

patternDither.jpg

Votes

Translate

Translate

Report

Report
Community guidelines
Be kind and respectful, give credit to the original source of content, and search for duplicates before posting. Learn more
community guidelines
LEGEND ,
Oct 25, 2012 Oct 25, 2012

Copy link to clipboard

Copied

.

Here's an attempt at the dither pattern. The colour layer is overlayed with a black and white Bayer 8x8 dither in Overlay mode at 40% opacity. Click on the images to see the dither pattern without forum downsampling.

Link to the dither plug-in: http://www.ximagic.com/g_index.html

comp.png

bw-dither-overlay-40.png

colour.png

Edit: added link to the dither plug-in.

Votes

Translate

Translate

Report

Report
Community guidelines
Be kind and respectful, give credit to the original source of content, and search for duplicates before posting. Learn more
community guidelines