Trevor's recommendation is well worth following, as usual.
If you do not have the opportunity to reshoot, the following may be helpful

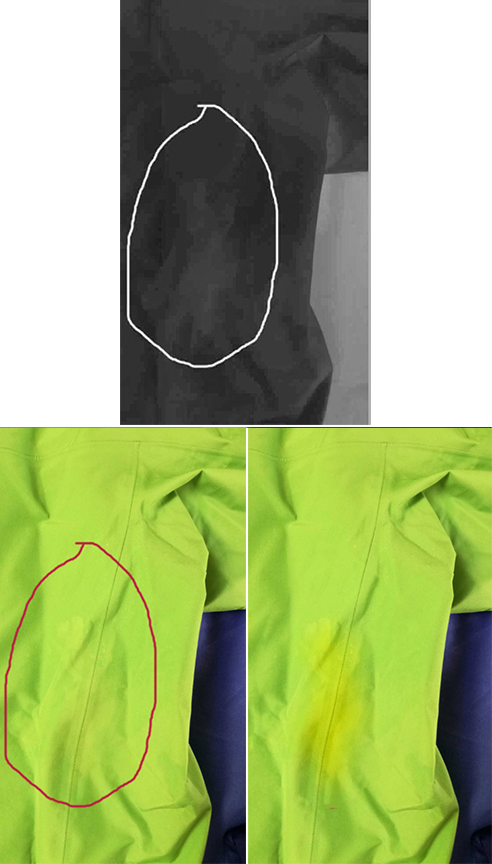
1. Make a duplicate layer and then change the Mode from RGB to Lab Color.
2. Choose the a Channel and drag it down to create an alpha channel that will be the basis for a mask.
3. Choose Curves and click on Auto. The result will look like the b&w image above
4. Increase the contrast further and use a soft edged brush to build the mask.
5. Return to RGB and apply the mask to the top layer
6. Use Curves to Increase the R and reduce the Blue (Blue reduction increases yellow). It is OK to overdo the change slightly.
(NOTE: At this point you have the option to favor orange-ish if desired.)
7. Use the Layers Opacity slider to tweak the amount of color change you want to create.


 5
Replies
5
Replies


 AdChoices