 Adobe Community
- Home
- Lightroom Classic
- Discussions
- Pictures look different between Developer and Libr...
- Pictures look different between Developer and Libr...

Copy link to clipboard
Copied
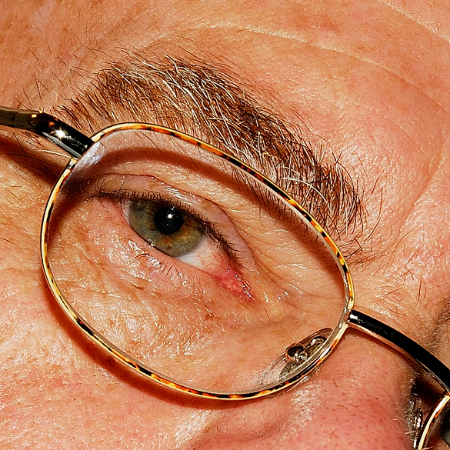
Hi everyone, I'm having a weird new issue with my Lightroom Classic CC. When I switch back to the Library after I have finished editing a photo it's like only some of the editing is coming through - some of the brush strokes in particular are missing (you can really see the difference if you look and the dad's face). I've attached an example for you all to see. This is something that just started happening and I'm not sure why. I was hoping that it was just the Library not fully loading the images, but they look the same after I've exported. I know it's hard to see the change in quality from a screenshot. As you can see, the top picture is the Library version and the bottom picture is the Develop/edited version.


 1 Correct answer
Looking at your screen shots on my secondary monitor I don't see any real difference between the 2.
Here they are put together in PS.

 14
Replies
14
14
Replies
14

Copy link to clipboard
Copied
First thing to try is to re-calibrate your monitor. That is almost always the reason for mismatch between Library and Develop.
Copy link to clipboard
Copied
I've never calibrated my monitor before. Does it make a difference that I'm using an iMac to edit?
Copy link to clipboard
Copied
ashleywarneraphotographer wrote
I've never calibrated my monitor before. Does it make a difference that I'm using an iMac to edit?
No but the problem might be the monitor profile that is being used now is corrupted.
Take a look at this webpage on how to switch the profile to sRGB to test.

Copy link to clipboard
Copied
I don't think this has anything to do with the monitor profile - the colors are identical in Library and Develop.
I see a slight difference in the man's forehead, it looks like you may have darkened the highlight a little.
Have you tried viewing the image at 1:1? This is the only view that's completely accurate.
Also view the exported image at 1:1.
Copy link to clipboard
Copied
I agree that there really doesn't seem to be any color variation between the two tabs. I viewed them at 1:1 and strangely they look the same. I did change the highlights as well as the sharpness level (which seems to be lost on all faces). I've attached a more zoomed in version of the picture so you can see the issue a little clearer. The top one is the the view from the Library (and what ends up being exported), the bottom picture is what I see in Developer. The top one is almost blurry, which obviously I don't want to turn over a blurry image to a client.


Thank you for your help!
Copy link to clipboard
Copied
I viewed them at 1:1 and strangely they look the same. I did change the highlights as well as the sharpness level (which seems to be lost on all faces).
Sharpening and noise reduction must always be applied and assessed at 1:1 view - any other view will be inaccurate and misleading because of image scaling.
I rarely enlarge images in Library (Loupe view), I prefer Develop, because I don't normally create 1:1 previews.
But I did a test now, and images looked soft in Fit view in Library. I then went to Library > Previews > Build 1:1 previews, which rebuilt the preview for the selected file.
The image then displayed much sharper in Fit view, so try rebuilding the previews.
Library and Develop use separate previews.
The Library previews are stored on disk in the Preview cache, whereas Develop previews are created on the fly.
So you are never looking at the original in Lightroom, you are looking at previews.
The top one is the the view from the Library (and what ends up being exported)
When you export a file, the edits you have done are applied to a copy of the original, so the exported file is not based on a preview.
Did you view the exported file at 1:1?
Copy link to clipboard
Copied
Thank you again for your help. I've viewed both at 1:1 (even side-by-side) and I'm still seeing a difference. What's strange to me is that I've never had this issue before, after I've finished with a picture in the Develop Module and then switched over to the Library Module they've always looked the same. When I went through the steps to build a 1:1 preview it told me I already had previews built for these pictures.
Copy link to clipboard
Copied
Sorry, I think I missed one important step in my description.
Before choosing Build 1:1 previews, choose Discard 1:1 previews.
That will force the preview to be rebuilt.
Copy link to clipboard
Copied
Per Berntsen, I tried it a couple times and I think it took? The alert kept saying that they "already existed or has been created."
Just Shoot Me: jpg to jpg (I need to start shooting in RAW but haven't really gotten there yet.)
The color space is RGB (the iMac default. I didn't see a difference when I switched it to sRGB so I switched it back).
Changing the Sharpness level in the Export window seemed to help a little bit.
Copy link to clipboard
Copied
Also make sure the Quality setting is set to 100 in the Export window.
Also you can export from the Develop module. Just Right Click on the image and select Export. But it shouldn't make a difference where you export from.
Also if LR hasn't updated the preview file for that image the Library module version will look slightly different.
Copy link to clipboard
Copied
What was the file type to begin with, JPG or RAW?
What file type are you exporting to, JPG or TIFF.
And what color space?
For some reason you will always see a slight difference. In the Export window there is a section for Sharpening. Try setting it to High and see if that helps.
Copy link to clipboard
Copied
Looking at your screen shots on my secondary monitor I don't see any real difference between the 2.
Here they are put together in PS.

Copy link to clipboard
Copied
Comparing images in differing modules is kinda like comparing them on different monitors or different computers or on pads or phones.
They will NEVER be the same.
If you intend to Print the images use the Develop Module to get the Printed look you want.
If you intend to show them on Web, develop them for that look.

Copy link to clipboard
Copied
I had the same issue..
Switching of GPU in performence (preferences) solved the problem!

 AdChoices