 Adobe Community

Copy link to clipboard
Copied
Having just updated Photoshop CC I have found that I can no longer print a simple narrow black border round my images using the Border option in the print settings box. This had been working perfectly satisfactorily until I installed an update a day or two ago - but now clicking on the button to produce a black border just has no effect.
I have tried the more elaborate way of producing a border using layers with increased canvas size etc but have again been unable to translate this into a print - albeit that the image with border does appear on the screen.
I have looked for an answer but can find nothing which really addresses this precise issue. Any help would be hugely appreciated!


 1 Correct answer
Not all printers are capable of printing right up to the edge of the paper, but if yours was working a few days ago this might indicate a problem with the printer driver. If I want a border I always generate it myself.
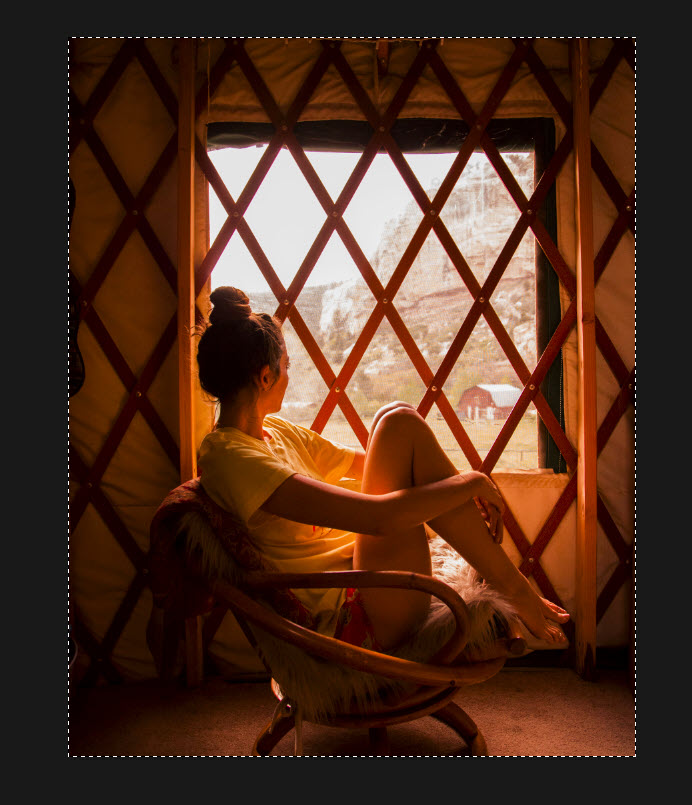
Starting with your image

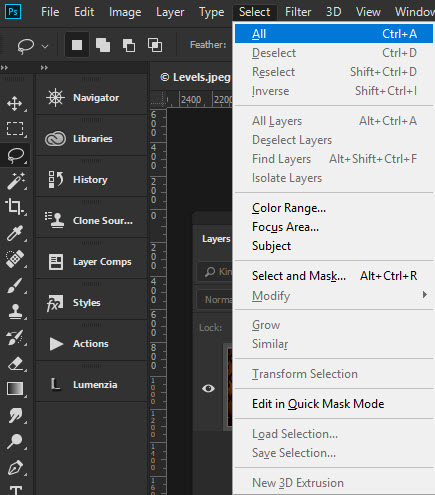
Select everything control or command A or use the menu
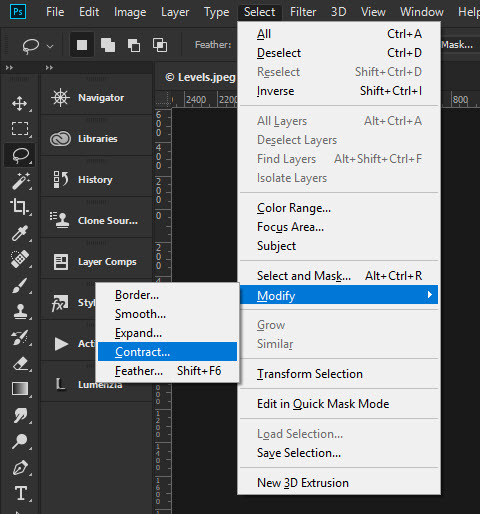
Then contract the selection to the size of border you want
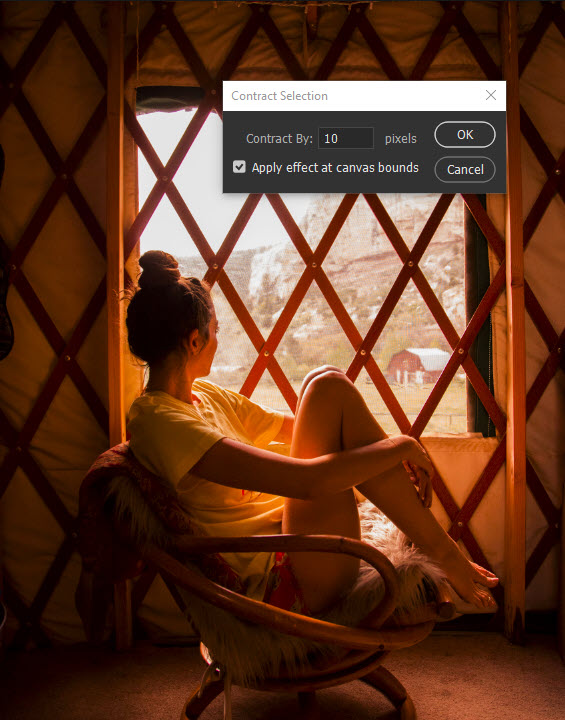
In this case 10 pixels, which is tiny with even a 72ppi image like this 10/72 so the border will be approx. 1/8 inch
Invert the selection so the bo
...Explore related tutorials & articles
 24
Replies
24
24
Replies
24
Copy link to clipboard
Copied
Not all printers are capable of printing right up to the edge of the paper, but if yours was working a few days ago this might indicate a problem with the printer driver. If I want a border I always generate it myself.
Starting with your image

Select everything control or command A or use the menu


Then contract the selection to the size of border you want

In this case 10 pixels, which is tiny with even a 72ppi image like this 10/72 so the border will be approx. 1/8 inch

Invert the selection so the border is selected

Press alt or option backspace/delete on the keyboard to fill with the foreground color, in this case black.

You can see on screen it works, but print to a pdf to check it is printable. It's possible you are just making your border to narrow.
Copy link to clipboard
Copied
Thank you so much. That seems to work perfectly - albeit with the slight loss of image area.

Copy link to clipboard
Copied
Select > All
Edit > Stroke... 2 (or more px), Black, Inside, Normal 100%
Select > Deselect
Copy link to clipboard
Copied
Many thanks. This works and seems a relatively simple way to achieve the desired result.
Copy link to clipboard
Copied
Have you changed any settings in your print dialog box? Is that how you were Printing a border?
Copy link to clipboard
Copied
Yes - that is what I was doing. Very straightforward and I had encountered no problems using this method until now. No other settings have been changed - unless through installation of the latest PS update...!
Copy link to clipboard
Copied
Okay - that's what I was wondering. I'll test that as well.

Copy link to clipboard
Copied
Does Photoshop Print Preview shoe the border will fit one the paper you using. He I set the border to be max size 0.15" You can see in the preview the side Borders will be on the paper. However, in this case the top and bottom borders would not fit on the paper used. It also shows this printer can not print edge to edge borderless

Changing the printer Paper setting can almost print edge to edge the top and bottom border still ]will not fit

Copy link to clipboard
Copied
I generally use A3 paper but a considerably smaller image size - probably not much larger than A4. I then have used the 'Border' button in the Photoshop Print Settings box to create a narrow black border (usually about 0.5mm) around the image area - so I don't think that there is any question of it not being able to fit. My method has worked perfectly in the past and I have changed nothing other than through adoption of the latest update.
Any further thoughts would be welcome - and thank you for your suggestions so far.
Copy link to clipboard
Copied
Yes there seems to be a bug I did the print and the border did not print. Someone else has a problem with the image name label option printing as vertical line not text my labels printed correctly with cc 2018.
Copy link to clipboard
Copied
Thanks - that's good to know. Hopefully it will be corrected in the future.
Copy link to clipboard
Copied
If you want to add the border without loosing any image if there is a background layers for printing you could easily create an action to do the job and then revert the document to its state before the pint action. The action would flatten the document so there would be a background layer only add canvas that is black on all sides some number of pixels to add the black borders print then revert the history to before the action first step flatten. Max border print provides is 3.5mm the action would do that.


Copy link to clipboard
Copied
You can get printer accessories that help produce borderless prints.

Copy link to clipboard
Copied
Yes replace the cutter with a black pen to add the black borders the OP wants
Copy link to clipboard
Copied
Lol You always hear about the latest technical breakthroughs first Trevor.

Copy link to clipboard
Copied
Trevor.Dennis wrote
You can get printer accessories that help produce borderless prints.
Where can I download that? Not crazy about the orange UI though...
Copy link to clipboard
Copied
https://forums.adobe.com/people/D+Fosse wrote
Trevor.Dennis wrote
You can get printer accessories that help produce borderless prints.
Where can I download that? Not crazy about the orange UI though...
I spent ten minutes knocking it up just for this thread  . I pulled the trees picture from my Flickr stream
You are more than welcome to the layered PSD if you want to use it for anything.
BTW, the orange gradient was definitely OTT and in questionable taste. I wanted a background to contrast the cut strip against, and it was coming up to 3am when I posted, so I'm claiming that my thinking was not as sharp as it could have been.

[EDIT] I meant to add that I have two of those trimmers. An A4 size and A3 size. Plus I have two matt cutters the bigger of which is a bit over a metre long. However, I never enter photo competitions nowadays, so never need to matte pictures. My Camera Club met this last Thursday, and I was reminded again at the inadequacies of completion judges. At Club level anyway. National exhibitions and saloons have at least three judges, and they are generally of better quality. Judges say such stupid things, and speak from a position of ignorance. This week she complained that an entry used flash and said that food photograph (that was the set subject) was best done with available light. Then she gave the next picture an Honours despite it being 'lit'.
Every situation is different and needs its own approach, but generally speaking, food photography works best when lit from behind and above, but you can do this with a camera mounted speedlite if you don't have studio lights. Mount a large sheet of white foam board above and behind the subject at about 45°, and angle the camera mounted speed light to light the foam board. Stick a bit of card under the speedlite to prevent direct light reaching the subject. It works exactly as if you placed a large softbox in place of the foam board

Copy link to clipboard
Copied
This looks like a bug that came in with a PS update. I have been using this for years - I regularly make prints on A4 paper to go into 10 x 8 inch frames, and having PS add a border is a very easy way to see where to guillotine them. As far as I can see the borders disappeared with update 19.1.1 (Feb 2018), which introduced all sorts of other problems with the print dialogue. And it is still there after updating to 19.1.2 (Mar 2018).
Yes I know it can be achieved by adding the border with Select All / Stroke. But I would be a lot happier if it carried on working like it always did.
JP
Copy link to clipboard
Copied
You should summit a bug report then to Adobe at Photoshop Family Customer Community
Copy link to clipboard
Copied
Thanks JJ. There is a larger thread over there about general problems with the print dialogue after 19.1.1 so I have appended to that, and asked whether it merits starting a new thread.
John
Copy link to clipboard
Copied
Start a new bug report that bug is listed as fixed in 19.1.2 Fixed issues in Adobe Photoshop CC if border still do not print. If you look down in the comment in the link you posted you will see an offical entry the bug is fixed in 19.1.2
Copy link to clipboard
Copied
I have opened a new problem as you suggest:
I am new to the forums and finding it quite hard to navigate around so I hope this is in the right place.
John
Copy link to clipboard
Copied
That’s good.
I’m new to it too so share your uncertainty!
Sent from my iPad

Copy link to clipboard
Copied
i have this problem too. Of course it's something you can bypass by editing, but the print settings was useful for prints with a white border around the image and was quick and straight forward without touching the image.
And since we are talking about it could be useful to add some settings about the color of the line.

 AdChoices