• Global community
    • Language:
      • Deutsch
      • English
      • Español
      • Français
      • Português
  • 日本語コミュニティ
    Dedicated community for Japanese speakers
  • 한국 커뮤니티
    Dedicated community for Korean speakers
Exit
0

How do I correct old photos that have MAJOR yellowing?

Community Beginner ,
Jan 04, 2017 Jan 04, 2017

Copy link to clipboard

Copied

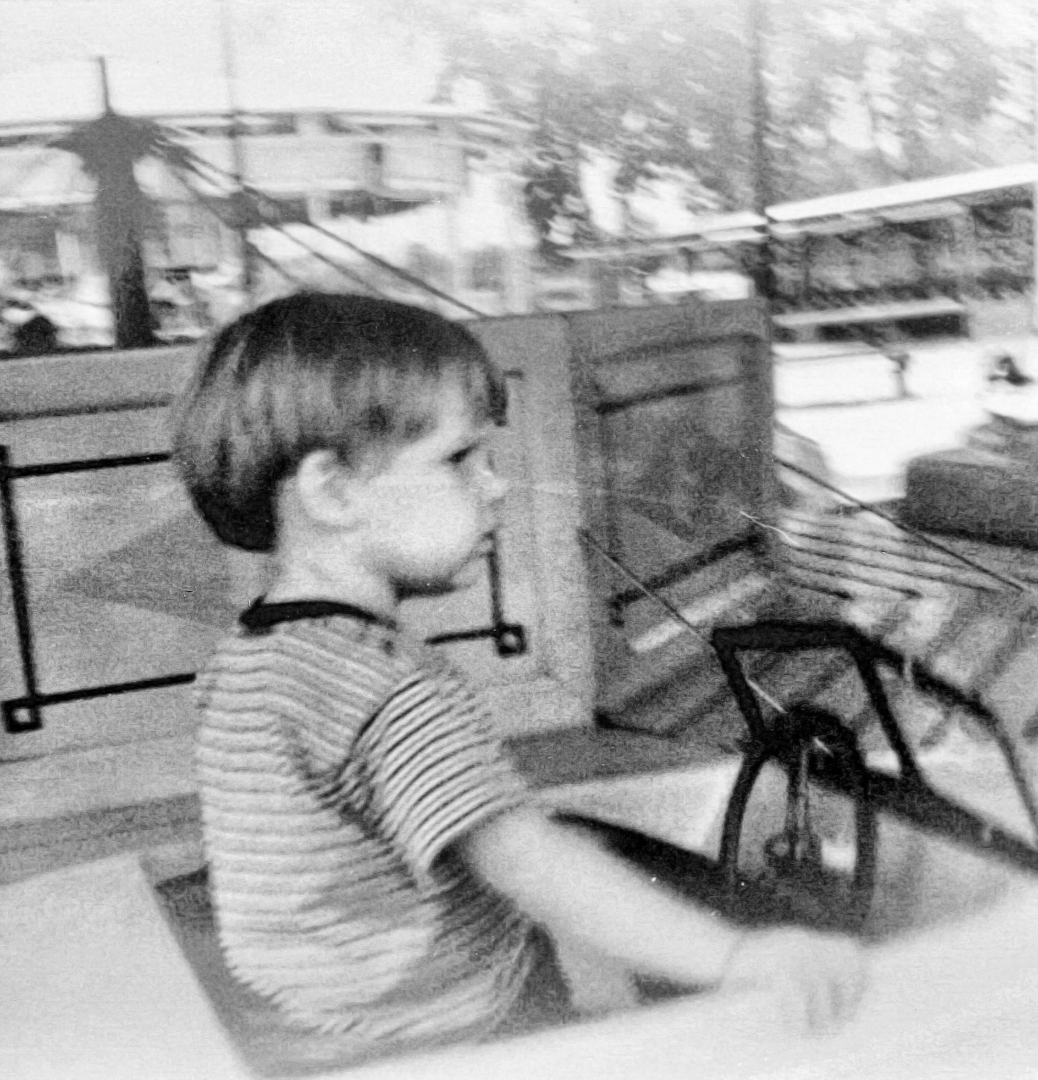
I have a stack of very old photos that all have the same yellowing issue.  I've tried adjusting the red, yellow and green levels individually and it helped but I'm thinking there is probably a better way?  I've attached an example.  Can anyone give me the steps to apply to get this photo looking somewhat normal? 

Thanks for any help!

IMG_20161230_0042.jpg

Views

1.7K

Translate

Translate

Report

Report
Community guidelines
Be kind and respectful, give credit to the original source of content, and search for duplicates before posting. Learn more
community guidelines

correct answers 1 Correct answer

LEGEND , Jan 04, 2017 Jan 04, 2017

It think you would fair better creating a B/W image and if required try tinting with color by hand.

yellowCast2.png

Votes

Translate

Translate
Adobe
Community Expert ,
Jan 04, 2017 Jan 04, 2017

Copy link to clipboard

Copied

One way :

First , Apply   image -> Auto Tone   ) ctrl + shiftt + L , you will get this result

Auto Tone.jpg

then convert it to sepia toning , from Hue/ saturation  ( ctrl + U )

Sepia Toning.png

hope this will Help,

Votes

Translate

Translate

Report

Report
Community guidelines
Be kind and respectful, give credit to the original source of content, and search for duplicates before posting. Learn more
community guidelines
Contributor ,
Jan 04, 2017 Jan 04, 2017

Copy link to clipboard

Copied

Yes the colors are mostly gone and perhaps BW or some toning with it gives more pleasant results. I took the method to use Camera Raw filter, first I made the image a smart object. I came with this with a quick tryout

quickie.jpg

You can see big difference between different areas and those could be processed further. But like this you get some colors

ACR settings:

settings.jpg

I also had a mild levels-layer with previous image so the result is not identical but this gives you my idea.

Votes

Translate

Translate

Report

Report
Community guidelines
Be kind and respectful, give credit to the original source of content, and search for duplicates before posting. Learn more
community guidelines
LEGEND ,
Jan 04, 2017 Jan 04, 2017

Copy link to clipboard

Copied

It think you would fair better creating a B/W image and if required try tinting with color by hand.

yellowCast2.png

Votes

Translate

Translate

Report

Report
Community guidelines
Be kind and respectful, give credit to the original source of content, and search for duplicates before posting. Learn more
community guidelines
Enthusiast ,
Jan 04, 2017 Jan 04, 2017

Copy link to clipboard

Copied

Like has been said already your best bet is B&W. I did this using a ton of adjustment layers...IMG_20161230_0042.jpg

Votes

Translate

Translate

Report

Report
Community guidelines
Be kind and respectful, give credit to the original source of content, and search for duplicates before posting. Learn more
community guidelines
Community Expert ,
Jan 04, 2017 Jan 04, 2017

Copy link to clipboard

Copied

Like Terri said

When the colour has gone as much as this I would go for black and white or a hand coloured - black and white approach

Dave

Votes

Translate

Translate

Report

Report
Community guidelines
Be kind and respectful, give credit to the original source of content, and search for duplicates before posting. Learn more
community guidelines
LEGEND ,
Jan 04, 2017 Jan 04, 2017

Copy link to clipboard

Copied

That is extremely good Dave. Who would believe the original could be turned into that?

Votes

Translate

Translate

Report

Report
Community guidelines
Be kind and respectful, give credit to the original source of content, and search for duplicates before posting. Learn more
community guidelines
Community Expert ,
Jan 04, 2017 Jan 04, 2017

Copy link to clipboard

Copied

Cheers Terri - bit rough and ready to be honest as I was in a rush.

I also realised I did not post how..... so, it was:

A black and white conversion

Then a new layer above with blending mode set to colour.

Then paint away .......

Dave

Votes

Translate

Translate

Report

Report
Community guidelines
Be kind and respectful, give credit to the original source of content, and search for duplicates before posting. Learn more
community guidelines
Community Expert ,
Jan 04, 2017 Jan 04, 2017

Copy link to clipboard

Copied

As Terri said, there really isn't enough information there to rescue any sort of coloured retouch of that image, and even as a B&W it is not the best of pictures, but it is at least usable that way.

Votes

Translate

Translate

Report

Report
Community guidelines
Be kind and respectful, give credit to the original source of content, and search for duplicates before posting. Learn more
community guidelines
Community Beginner ,
Jan 04, 2017 Jan 04, 2017

Copy link to clipboard

Copied

LATEST

Thank you!  I appreciate the feedback!  I'm going to give it a shot with b/w and maybe hand painting.  Thanks again!

Votes

Translate

Translate

Report

Report
Community guidelines
Be kind and respectful, give credit to the original source of content, and search for duplicates before posting. Learn more
community guidelines