 Adobe Community
- Home
- Lightroom Classic
- Discussions
- Can I change saturation in different locations?
- Can I change saturation in different locations?

Copy link to clipboard
Copied
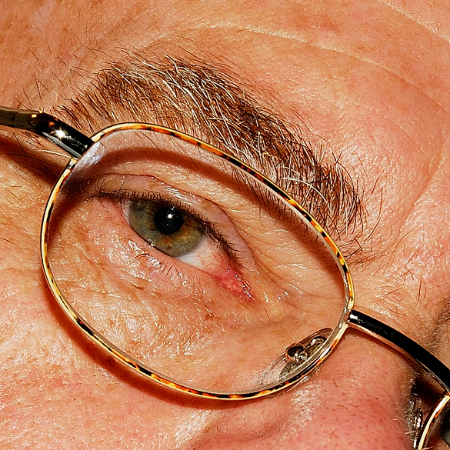
I have an image of a face where I would like to lower the saturation of the entire face, but increase the saturation of the eye pupils. Is this possible? It looks like the adjustment brush is not the way to do this since it can only apply to the previous saturation state. Thanks!


 1 Correct answer

1. In the HSL panel choose 'Saturation'
2. Set all sliders to -100
3. Use the Brush Tool to paint, or the Radial filter circles over faces, with Saturation slider set to +100 to re-introduce color.
 9
Replies
9
9
Replies
9

Copy link to clipboard
Copied
As you've already mentioned, local adjustment brush is the only way you can localise an adjustment.
Copy link to clipboard
Copied
Paul Dandurand wrote:
I have an image of a face where I would like to lower the saturation of the entire face, but increase the saturation of the eye pupils. Is this possible? It looks like the adjustment brush is not the way to do this since it can only apply to the previous saturation state. Thanks!
No you can create many different adjustment brushes, one over the top of the other.
Google "Using the local adjustment brush in Lightroom" for detailed instructions and video tutorials.
Copy link to clipboard
Copied
While stacking local adjustments is doable it needs to be handled carefully. This especially the case when increasing adjustments such as saturation, which can very quickly result in high levels of noise.
Copy link to clipboard
Copied
Thanks Ian and Just Shoot Me. I found the Radial adjustment also as an option, but it's limited to only one selection. It won't work for two spots, such as two eyes. The brush approach will need to be the way to do it.
Copy link to clipboard
Copied
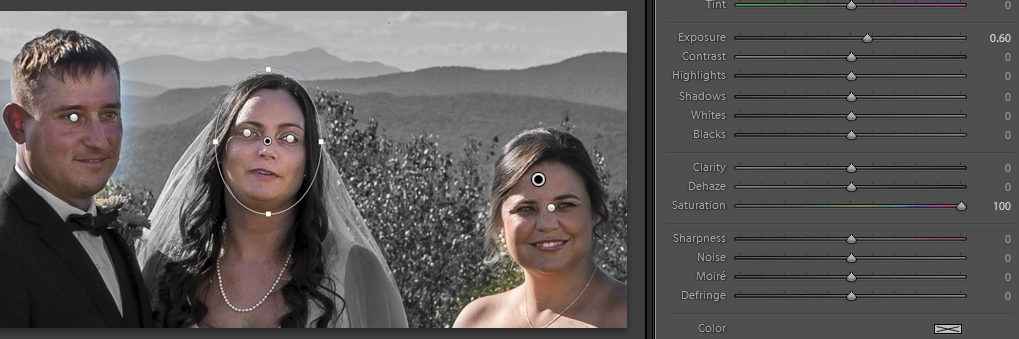
You can place 1-2-3-4-5-10-100 radial filter Filters into any one image. All you have to do is click the New option at the top of the Filter area. Invert the Mask with the check box near the bottom of the Filter box. Using the Alt and Shift keys you have many options for placing the mask boundaries.

These are all radial filters. Some on top of others.
Copy link to clipboard
Copied
Hmm... I tried that with no success. In the wedding image you have, I see you have three radials, one for each face. Let's say you want to keep all faces in color and make everything else black and white. What would be your steps?
Copy link to clipboard
Copied
IIRC this is the first time you mentioned anything about B&W. Simple Desaturate.

I actually have 5 radial filters applied. you can also use the Brush tool to add or erase the affect.
Copy link to clipboard
Copied
1. In the HSL panel choose 'Saturation'
2. Set all sliders to -100
3. Use the Brush Tool to paint, or the Radial filter circles over faces, with Saturation slider set to +100 to re-introduce color.

Copy link to clipboard
Copied
Ah, that's pretty cool. Thanks!

 AdChoices