• Global community
    • Language:
      • Deutsch
      • English
      • Español
      • Français
      • Português
  • 日本語コミュニティ
    Dedicated community for Japanese speakers
  • 한국 커뮤니티
    Dedicated community for Korean speakers
Exit
0

How to best build a repeatable ladder pattern?

Participant ,
Feb 11, 2017 Feb 11, 2017

Copy link to clipboard

Copied

Hello everybody, I'm currently trying to give an old, worn out print a new, clean frame. This is not professional restauration but just for fun and training.

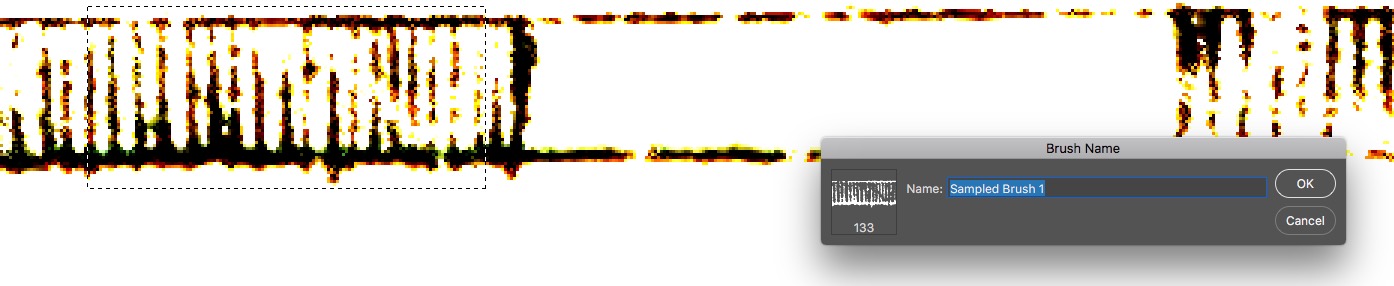
Below you can see a sample of the frame:

Ladder Pattern.jpg

In the beginning I was thinking about reusing the old frame and redrawing the individual lines to preserve the beautiful hand-drawn look, but it's not worth it. The print is very large, this sample is just about 1% of the whole frame. The time I can save on the frame I can put into the print itself, where it will show more.

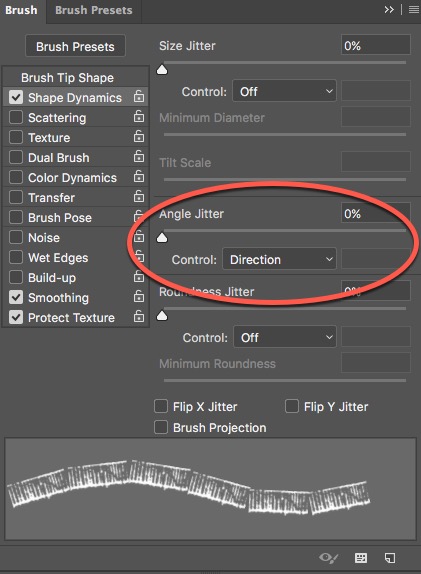
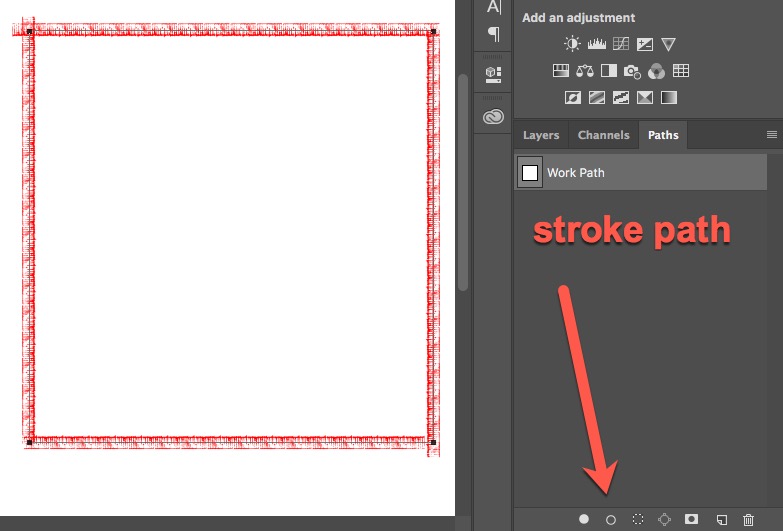
So I decided to rebuild the frame with more automated methods, something I have little training with. One method would be to paint a single segment and then copy/paste them. But I was wondering if there were better methods. Is there, for example, a way to create a path in this ladder pattern so I could try to scratch it with various brushes to see which gives it the best texture? (My main concern with this method is that the many vertical bars would have to be drawn a bit thinner than the long horizontal bars, and I wouldn't know how to do that with only one path.) Or would it be better to whip out Illustrator from the get go? (Which I would first have to do some basic training with, sigh.)

Views

878

Translate

Translate

Report

Report
Community guidelines
Be kind and respectful, give credit to the original source of content, and search for duplicates before posting. Learn more
community guidelines

correct answers 1 Correct answer

Community Expert , Feb 11, 2017 Feb 11, 2017

You can turn it into a brush.

I applied levels to get mostly black and white.

Make a selection, go to Edit, define brush

2017-02-11_10-51-44.jpeg

Set Angle Jitter Control to Direction, spread them out in the shape part

2017-02-11_10-53-15.jpeg

You can paint by hand or run the brush on a path - I just made a rectangle with rectangle tool - make sure in the options bar it's set to path, not shape.

2017-02-11_10-55-10.jpeg

Votes

Translate

Translate
Adobe
Community Expert ,
Feb 11, 2017 Feb 11, 2017

Copy link to clipboard

Copied

You can turn it into a brush.

I applied levels to get mostly black and white.

Make a selection, go to Edit, define brush

2017-02-11_10-51-44.jpeg

Set Angle Jitter Control to Direction, spread them out in the shape part

2017-02-11_10-53-15.jpeg

You can paint by hand or run the brush on a path - I just made a rectangle with rectangle tool - make sure in the options bar it's set to path, not shape.

2017-02-11_10-55-10.jpeg

Melissa Piccone | Adobe Trainer | Online Courses Author | Fine Artist

Votes

Translate

Translate

Report

Report
Community guidelines
Be kind and respectful, give credit to the original source of content, and search for duplicates before posting. Learn more
community guidelines
Participant ,
Feb 11, 2017 Feb 11, 2017

Copy link to clipboard

Copied

Very cool! I didn't think of turning the sample ITSELF into a brush. I'll try it with a pattern that contains a gap like in the sample, because its always ladder pattern - gap - ladder pattern - gap.

Votes

Translate

Translate

Report

Report
Community guidelines
Be kind and respectful, give credit to the original source of content, and search for duplicates before posting. Learn more
community guidelines
Guide ,
Feb 11, 2017 Feb 11, 2017

Copy link to clipboard

Copied

One more idea: Created with a brush and with painting.

A ladder-like border

muster1.png

Fenja

Votes

Translate

Translate

Report

Report
Community guidelines
Be kind and respectful, give credit to the original source of content, and search for duplicates before posting. Learn more
community guidelines
Community Expert ,
Feb 11, 2017 Feb 11, 2017

Copy link to clipboard

Copied

LATEST

If you want a rough hand drawn look, have a think about using a custom brush.  The red object is the defined preset.  Shape dynamics as shown, and scatter is set to 5%.   Spacing is obviously set so each stamp abuts the previous one.   There is always an issue setting Angle jitter to Direction, in that the first stamp tends to be at a random angle.  I don't know of any fix for that other than using separate layers and erasing the errant stamp.

Votes

Translate

Translate

Report

Report
Community guidelines
Be kind and respectful, give credit to the original source of content, and search for duplicates before posting. Learn more
community guidelines