Copy link to clipboard
Copied
I want to create something like the below image for a magazine article. Does anyone know how I would go about this or can link tutorials to how to do it? I have done a few Google searches but the only tutorials that come up are for grungey text or glitched text, whereas I want something like the below.
Any help is greatly appreciated.
You could do something with 3D for this. The aim is to make the text from raised pins against a grid of holes.
A very simplified version is below. You could modify the pattern to give the other punched holes and add a paper texture instead of the plain colour I used.
Use a pattern of black dots on 50% grey with an inversion (so white dots on 50% grey) for text. Then create a Mesh from that Depth Map.
Colour the pattern for the diffuse material
Then add some lighting.
I hope that gets you started
Dave
Copy link to clipboard
Copied
I guess you could use a 3D Depth Map (the text under a grid Pattern), with some Spot Lights …
But quite frankly I doubt Photoshop is a good choice for this.
Copy link to clipboard
Copied
What would you recommend to create this?
Copy link to clipboard
Copied
You could do something with 3D for this. The aim is to make the text from raised pins against a grid of holes.
A very simplified version is below. You could modify the pattern to give the other punched holes and add a paper texture instead of the plain colour I used.
Use a pattern of black dots on 50% grey with an inversion (so white dots on 50% grey) for text. Then create a Mesh from that Depth Map.
Colour the pattern for the diffuse material
Then add some lighting.
I hope that gets you started
Dave
Copy link to clipboard
Copied
This is brilliant, thank you.
Would you mind helping me in explaining how to create the pattern at 50% grey and 50% inverted white? I am relatively new to Photoshop (usually use Illustrator) but I am looking to expand my skills in it.
Thanks!
Copy link to clipboard
Copied
Hi
I created the pattern like this.
1. Create a new document 20 pixels x 20 pixels with a white background. This is that doc viewed at 800% zoom
2. Drag a guide from the top ruler and the side ruler so they snap over the centre point
3. Select the ellipse tool and set the options to be a shape filled with black and to be a circle drawn from the centre
4. Put your cursor in the centre and drag out a circle 10 pixels across
5. Go to Edit - Define Pattern and give your pattern a name (e.g. Dot)
6. Open a new document of whatever size you want - example below is 1000 x 1000 pixels.
Edit - Fill with 50% grey
7. Add a new layer above that grey background.
Edit Fill - Pattern - and choose the Dot that you just saved in step 5
8. Set the layer blending mode to multiply - you will now have black dots on a grey background
9. Use the Text tool to add text (with colour set to 50% gray (H 0% S0% B50%) and size it so that it covers the dots and does not half cover any.
10. Duplicate the layer with the dot pattern and place this duplicate above the text layer . Set the blending mode to multiply and Alt click on the border between this layer and the text layer below so that a downward arrow appears. This means it only shows where the text layer has text.
11. Add an Invert adjustment layer above the new layer and Alt click on the border between that and the layer below so that the small downward arrow appears
11. Select all 5 layers - right click and choose Convert to Smart Object. I've then named it PINS below.
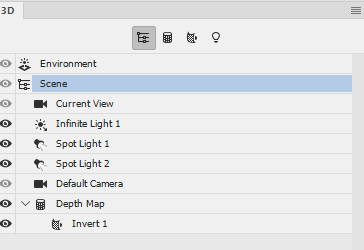
12. You can now switch to the 3D workspace. Highlight your "PINS" layer and in the 3D panel choose Mesh from Depth Map - Solid Extrusion and Source - Selected layers.
You now have a model that you can colour - texture , light etc
I hope that helps you
Dave
Copy link to clipboard
Copied
ah this is brilliant! Thank you for giving me a clear list to follow, this is really helpful!