 Adobe Community
- Home
- After Effects
- Discussions
- Want to create 'misaligned printing' effect on ani...
- Want to create 'misaligned printing' effect on ani...
Copy link to clipboard
Copied
Hi,
I am about to start a project and looking to figure out a workflow to get the look the designer has come up with.
basically, the style is flat shapes, using shape layers. we want to offset all the black outlines (2pt strokes) a few pixels as if they have been printed slightly out of alignment.
Ideally, I will animate the work normally, with standard after effects shapes containing fills and strokes. I will simply have 2 duplicates of the main animation comp in my output comp, and one would only show all fills, while the other would only show all strokes, then I can offset the two layers by a few pixels.
isolating the black strokes is easy, simply using the extract effect.
My issue is finding a way to get my colour fills layer. I Want to have an instance of the main animation comp but apply something to it that 'mutes' all the black strokes. the extract filter will not work as it will leave blank lines where the strokes have been removed. I need some way of hiding all strokes in a comp from its parent comp.
I have already created a video in this style but it was quite inefficient making two copies of all the animation; one with strokes only and one with filIs only. I don't want to have 2 separate 'main animation' comps in the project as this could be problematic when client changes come in and waste a lot of time when exporting WIPs
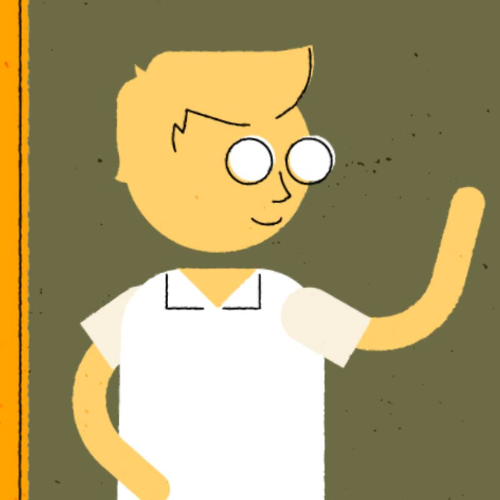
An example of the desired effect below.
Thanks in advance.


 1 Correct answer
I have now also taken this query to the AE scripting forum (as Mike_Abbott sugested.)
for anyone following or interested:
Looking for a script to hide all strokes in a comp from the parent comp level.
 14
Replies
14
14
Replies
14

Copy link to clipboard
Copied
This is easier than you think.
Create your animation with both fill & stroke in place. Get Edit lock -- i.e. no further changes will be allowed.
Duplicate your comp TWICE. In one comp, change the fills to transparent. In the other comp, eliminate the strokes. In a new comp, add these duplicated comps. Alter the position of one of them and you're set to go!
Copy link to clipboard
Copied
LOL! "edit lock". is that like unicorns and flying pigs?
Seriously though. The reason for this post is to create a workflow, where I can avoid any duplication of the main animation.
Final animation will be far more complex and upwards of 4 minutes long.

Copy link to clipboard
Copied
Dave's proposal is a good one IMO, but If you're doing lots of WIP, going back and forth etc, I can understand manually switching strokes and fills on and off can be a pain - particularly if you have lots of shape layers... although your example above suggests not...
If you do need some more 'automation' I don't think it would be difficult for an experienced scripter to write a basic script that would iterate through selected layers and toggle stroke and/or fill visibilty on or off.
You could do your animation on one set of layers, dupe the layers, toggle off visibilty with the script, offset position and render.
Ask in the scripting forum - see 'subspaces' above.
Copy link to clipboard
Copied
yes it will be a lot more complex than the example still I have supplied. that was just a demo for my producer. final product will be a 3-4 min explainer vid, so we expect many client changes.

Copy link to clipboard
Copied
Here's a hint for producing "explainer videos" in AE. Break the audio track up into sentences or phrases. Include only one sentence or phrase per comp instead of putting the entire 4 or 5 minutes in a single comp, animate the comps and then render each comp, put the rendered files in Premiere Pro and then edit them and polish up the sound track.
For creating the artwork use Adobe Illustrator. Put each element that is going to animate on a separate clearly labeled layer. Position the artwork in the hero position on a standard production sized artboard. If you are working in HD then that's 1920 X 1080 pixels (points). Make sure Snap to Pixel and Pixel preview are turned on in Illustrator. Creating the artwork in the hero position as a layered Illustrator file means that you can start with the composition with everything already positioned in exactly the right spot to emphasize the word or phrase that is the hero of the shot then set your first keyframes at precisely the spot in the timeline and then animate backwards and forwards to create the rest of the shot. Sometimes this means the Illustrator artwork will have a bunch of images stacked on top of each other, but it will save hours of production time in a 5 minute video.
Unless you specifically need to use Shape Animators, ike wiggle or trim paths, there is no reason at all to turn the AI layers into shape layers. You'll also have much more control over the look of the illustrations and the way that strokes, fills, gradients and other design elements are applied.
I figured this out after doing my first dynamic text animation - lyric video - explainer video (whatever you want to call this style). It was about 9 minutes long and after 4 incredibly long days I was about 3 minutes into the video and had more than 100 layers in my composition when some copy changes came in. That's when I broke the comp up into individual comps that were the shots I would have taken if I was filming artwork with a camera and things went much faster.
One more hint that saves a huge amount of time. Use Adobe Audition to put and label markers in your audio track before you start editing. You can also use earlier versions of Premiere Pro and Audition to analyze the speech on an audio track and add markers with the words directly to an audio track. When you import the audio into AE you'll be able to see the markers in the timeline and this will save you a bunch of time. Using these techniques I've cut my production time on this kind of work by about 70% and it takes hardly any time to go in and change a word or phrase when the client makes those requests.
Good luck on your project. I hope these suggestions help.

Copy link to clipboard
Copied
So let's take the cat for an example. Your issue is that when, on the instance of the animation you want only to be fills, you key out the black you are ending up with transparency where the nose, mouth & pupils were? So you're not only losing the outer stroke but also anything and everything that is black?
Copy link to clipboard
Copied
that is correct gutter fish. It wouldn't look too bad on a simple thing like the cat, but when the screen gets busy, it will just add too much clutter.
Copy link to clipboard
Copied
I would suggest trying to use a matte choke rather than a key. It depends on your specific assets and how you've built them but a matte choke will "choke in" the borders of your alpha channel. In theory this should get rid of the outer stroke and leave any inner detail alone.
Copy link to clipboard
Copied
Follow up:
How many paths will you have? There might be another option with shape layers if you've only got a simple set up like you show above.
Copy link to clipboard
Copied
It is really easy to duplicate a path on a shape layer, change the position of the path and remove the stroke or add a fill. No need to duplicate layers. You can even add separate shape animators to each path on a layer. There are also groups that can be applied. I've done this kind of thing before and because of the style I wanted I kept each character on a separate shape layer but separated and renamed the various elements in the timeline. Something like this, then click on a path, press enter and name the path. Editing and changes were much easier than dealing with the 90 or so elements I had to work with on separate layers and in nested pre-comps.

After Naming - cheesy example:

You can even change the blend modes of the strokes and fills. Not as powerful as drawing in Illustrator but pretty neat stuff.

Copy link to clipboard
Copied
Just a few more ideas. I'm guessing the right answer will depend heavily on how all this stuff actually needs to move.
Along the lines of Rick's suggestion, look at putting things into different groups in a shape layer - you can easily duplicate an entire group and even pickwhip certain elements (like the paths) together, etc. You'd still have to toggle the fill/stroke within the group, but once you got it set up, I'm guessing you're set. Since each group has its own transform, it'd be easy to offset, and then you've still got all your art on one layer.
If it seems more convenient to have them on separate layers, you might look at "Copy with Property Links" (or ..."Relative Property Links," as appropriate.) A tool like Explode Shape Layers gives you easy one-click selection of ALL the fills or ALL the strokes on a layer. You could build one layer with both fill and stroke, the dupe it, parent it, offset it, then CLICK kill the fills, CLICK the other, kill the strokes. You could manually pickwhip anything that may change often or that you'll be keyframing.
Also - Shape Layers are a great candidate for using the timeline's Search bar. select shape layer, type "Stroke" and it'll reveal only the strokes on that layer. Way easier that manually twirling it all open.
Re: your original workflow - depending on how colorful the artwork is, you might look at just using black and white (+ 50% gray?) in your animation comp, and then you could potentially use a combo of Tint, Tritone, blending modes, luma mattes, etc. to selectively color and hide pieces of the artwork in your main "build" comp.
Copy link to clipboard
Copied
Kyle is suggesting exactly what I was thinking of - easy to set up and everything is ready to go in one comp.
.png)
Copy link to clipboard
Copied
If this is going to be basic animation like that example you provided it would be simpler to do this in Photoshop. Otherwise do what the others said.
Copy link to clipboard
Copied
I have now also taken this query to the AE scripting forum (as Mike_Abbott sugested.)
for anyone following or interested:
Looking for a script to hide all strokes in a comp from the parent comp level.

 AdChoices