• Global community
    • Language:
      • Deutsch
      • English
      • Español
      • Français
      • Português
  • 日本語コミュニティ
    Dedicated community for Japanese speakers
  • 한국 커뮤니티
    Dedicated community for Korean speakers
Exit
0

Help with logo vectorization

Community Beginner ,
Nov 08, 2017 Nov 08, 2017

Copy link to clipboard

Copied

Hey all,

I'm doing a logo design for a company. Here's a sketch of the logo:

help2.JPG

I want to have both the white and black lines on the same weight (unlike the sketch). So when I try to vectorize it, i decided to take the middle black line, trace it until halfway down, copy and mirror it down, add white stroke, expand, add black stroke, then the rest of it.

but instead what happens is the following:

The outermost strokes always turns out to have this weird ugly angles. If i modify it at this point the monoweight line effect is gone. I tried it with 4 different line weights and it always came out wrong. I have been using illustrator for a while but somehow this type of problem avoided me.

Does anybody have any advice about this? Thanks!

Views

626

Translate

Translate

Report

Report
Community guidelines
Be kind and respectful, give credit to the original source of content, and search for duplicates before posting. Learn more
community guidelines

correct answers 1 Correct answer

Community Expert , Nov 09, 2017 Nov 09, 2017

This is one way to approach it.

  1. Draw one of the lines with the line weight that you want.
  2. Select it and Object > Path > Outline Stroke, to make it into a closed shape.
  3. Duplicate it four times. all the shapes should touch. That may be easier to see in View > Outline. There should be 5 shapes total.
  4. Select all five shapes, and Object > Path > Add Anchor Points.
  5. Repeat Object > Path > Add Anchor Points. There will be anchor points as shown:
  6. With the Direct Selection tool, select just the anchor points sh
...

Votes

Translate

Translate
Adobe
Community Expert ,
Nov 09, 2017 Nov 09, 2017

Copy link to clipboard

Copied

This is one way to approach it.

  1. Draw one of the lines with the line weight that you want.
  2. Select it and Object > Path > Outline Stroke, to make it into a closed shape.
  3. Duplicate it four times. all the shapes should touch. That may be easier to see in View > Outline. There should be 5 shapes total.
  4. Select all five shapes, and Object > Path > Add Anchor Points.
  5. Repeat Object > Path > Add Anchor Points. There will be anchor points as shown:
  6. With the Direct Selection tool, select just the anchor points shown:
  7. Move them to the left and note how far you moved them. I held down Shift and hit the left arrow key 4 times to move them.
  8. Select the lower anchor points and move them the same distance but in the opposite direction.
  9. With the same anchor points still selected, click the icon shown below to convert them to smooth points.
  10. Use the Direct Selection tool to select the top anchor points and repeat to convert them to smooth points.
  11. Draw a circle with no fill and the same line weight you used for the other lines. The circle should intersect the wavy shapes. It's ok if the wavy shapes go past the circle.
  12. With the circle selected, Object > Path > Outline Stroke.
  13. Select everything.
  14. Select the Live Paint tool.
  15. Fill all the areas you want to remove with white, including areas of the wavy shapes that extend past the circle. Helps to zoom in.
  16. With the live paint object selected, choose Object > Live Paint > Expand. Each area will become a separate closed shape, and all areas will be grouped.
  17. This is what it looks like in outline view:
  18. With the Direct Selection tool or the Group Selection tool, delete all of the white areas.
  19. In Outline view you will see that there are some pieces that you may want to combine.
  20. If you select the objects you can either use the Shape Builder tool to drag over areas and unite them.

Votes

Translate

Translate

Report

Report
Community guidelines
Be kind and respectful, give credit to the original source of content, and search for duplicates before posting. Learn more
community guidelines
Community Beginner ,
Nov 09, 2017 Nov 09, 2017

Copy link to clipboard

Copied

wow thats a great guide, thank you for taking the time!

Votes

Translate

Translate

Report

Report
Community guidelines
Be kind and respectful, give credit to the original source of content, and search for duplicates before posting. Learn more
community guidelines
Community Expert ,
Nov 09, 2017 Nov 09, 2017

Copy link to clipboard

Copied

You're welcome!

Votes

Translate

Translate

Report

Report
Community guidelines
Be kind and respectful, give credit to the original source of content, and search for duplicates before posting. Learn more
community guidelines
Enthusiast ,
Nov 10, 2017 Nov 10, 2017

Copy link to clipboard

Copied

Years ago I had a very similar task.

Needed make curvy lines and equal spacing between.

So I thought I would share my method if interested.

With pen tool, I made a zig zag path. Corner points.

Made and Art brush with Fill paths.

Applied Art brush to zig zag.

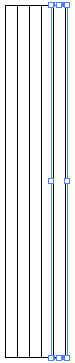
With the Direct Selection tool, selected the two center anchors and applied a large Round Corner. (Effect>Stylize>Round Corners).

EZ edits!!!     Your Art Brush, anchor points on stroke, radius on Rounded Corners.

Expanded Appearance, Expanded strokes & fills.

Next Live Paint.

Expanded Live Paint. Pathfinders>Unite.

K

Round Corners, art brush.png

Votes

Translate

Translate

Report

Report
Community guidelines
Be kind and respectful, give credit to the original source of content, and search for duplicates before posting. Learn more
community guidelines
Community Beginner ,
Nov 10, 2017 Nov 10, 2017

Copy link to clipboard

Copied

LATEST

epic, thank you! ❤️

Votes

Translate

Translate

Report

Report
Community guidelines
Be kind and respectful, give credit to the original source of content, and search for duplicates before posting. Learn more
community guidelines