 Adobe Community

Copy link to clipboard
Copied
Hi. I'm trying to automate process of exporting assets for animation purposes. I'm using Generate Assets option with layer naming (45% name.png). Unfortunatelly after 2 days I noticed that B&W assets are too bright. Turned out Photoshop decided to export all the b&w assets in grayscale ruining their proper brightness. How do I avoid that? I want color to be proper, would be great to export them as RGB.


 1 Correct answer

I have found the solution to this.
1. Install the Generator Config panel available for download here:
https://github.com/adobe-photoshop/generator-assets/wiki/Configuration-Options
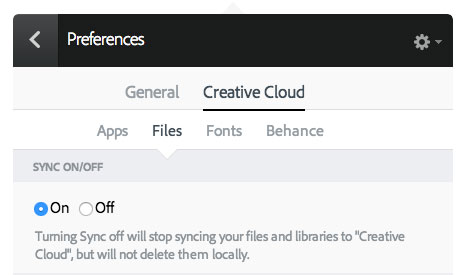
2. Make sure you have downloaded the Creative Cloud desktop app, and "File Sync" is switched ON
3. After installing the Config panel, open Photoshop and show the Generator config panel

4. Now, make sure to check ON "Color convert pixels" as well as "Use FLITE trascoder". Then, press "Save" in that same panel.
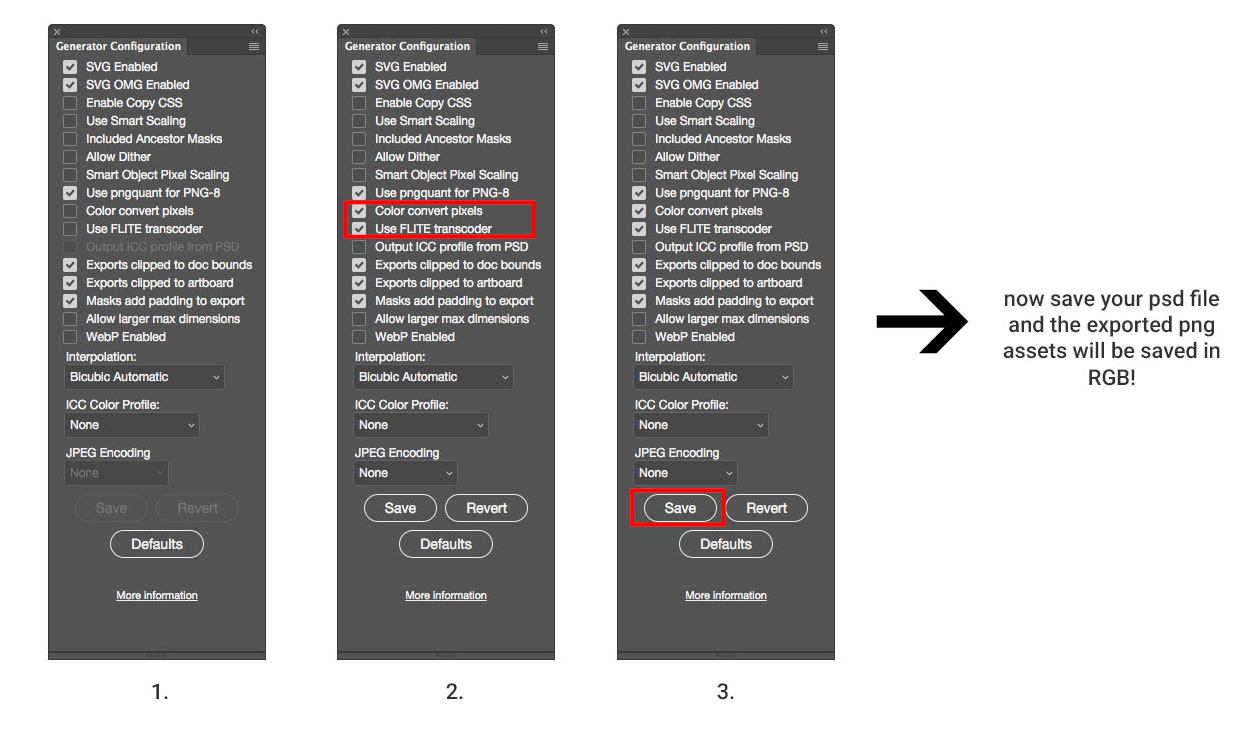
5. Save your p
...Explore related tutorials & articles
 12
Replies
12
12
Replies
12

Copy link to clipboard
Copied
If the originals are grayscale, just check "convert to sRGB" in the Export dialog.
Check "embed profile" as well if the rest of your process is color managed.
Generally, grayscale support is very poor outside Photoshop, even in supposedly color managed applications, and you never know if they will be properly handled. The safest bet is to convert to gray gamma 2.2, or sGray (which uses the same tone response curve as sRGB).
Copy link to clipboard
Copied
What export dialog do you mean? I'm using the "Generate Assets" option added in CC, that exports assets based on alyers/group names every time I save the document. In "Export Preferences" "Convert to sRGB" is checked, but it looks like it doesn't apply to generated assets.
Copy link to clipboard
Copied
Ah, OK, I'm not too familiar with that feature.
If nothing else works you may need to batch convert to sRGB first (which is very straightforward) - perhaps as copies to a separate folder so as to not overwrite your originals.
Are your originals grayscale? If they are intended for screen the only sensible grayscale profile to use is gray gamma 2.2. The Photoshop default for working gray, dot gain 20%, is intended for offset presses and not suitable here.
But as I said, grayscale support is very iffy everywhere except Photoshop. Use at your own risk. Gray gamma 2.2 should display correctly even without color management, but no guarantees.
Copy link to clipboard
Copied
I'm working on sRGB file, not in grayscale. Exported assets are too bright, so batch converting them won't help, as they will still be to bright. I know some solution would be to batch edit levels so the brightness match (more or less) the original, but that's not a quick and proper workaround.
Copy link to clipboard
Copied
Then where does grayscale come into the picture? There's no way Photoshop can export grayscale from RGB originals without some very specific user input.
If they are just brighter, you either have a bad monitor profile causing Photoshop to display incorrectly - or you're just seeing the normal difference between color managed (Photoshop) and not color managed (somewhere else).
I think some screenshots are in order here, so we know what we're talking about.
Copy link to clipboard
Copied
I'm not a beginner. I don't mean a difference in displaying the picture, I mean the difference in color code and displaying in Photoshop.
So, screenshots. Let's make a standard document and create 2 objects - one that has color and one that's made with only white and gray color. As you see on the right side, one should export in 50% scale with name test_color.png, and the other 50% scale with name test_white.png
Here's the "Generate>Image Assets" checked.
After this, I save the document. Now I have a folder with assets - these 2 elements scaled to 50%. Let's open them. First one - red.
Looks fine. RGB mode. Now white.
What the? At which point have I decided to export this in grayscale? The files were both exported in the moment I saved the document. Where is my very specific input? Seems like Photoshop just tries to be smart and decides to export it in grayscale, cause this element doesn't use anything other than white and gray.
Lastly - here's exported 50% size ball (#d7d7d7) on the original ball (#cccccc). 
Copy link to clipboard
Copied
Ah, I see. Now that's weird and I have no explanation for this behavior - other than a "smart" attempt to reduce file size by throwing out two of three channels. Yes, I hate it too when software tries to do my thinking for me.
But I also think I see the reason for the difference in gray tones. The exported asset has no icc profile embedded, which means it will display according to your working gray. If you haven't changed any defaults, this will be a dot gain profile.
I'm fairly confident that if you change your working gray to gamma 2.2, they should be a lot closer.
But again - in the absence of icc profiles you will never have any guarantee that numbers and / or displayed color will match. Hex numbers no more than RGB numbers. They're just different notations for the same thing. This is exactly what icc profiles are for.
Copy link to clipboard
Copied
That actually helped a bit, colors are almost identical now in PS, so I'm marking your reply as helpful. Still I need to apply workaround (action - open and save as RGB) to every b&w asset.
I don't think the problem is 100% solved, so I'm leaving the topic open, but I don't expect anyone to give me a solution. It would be perfect if someone from "up there" noticed this and add to some notes. If moderation thinks this should be closed, then close it. For me the workaround is satisfying. Thanks.
Copy link to clipboard
Copied
It seems that's the best we can do for now.
I fully agree that this auto-conversion to grayscale shouldn't happen - unless you ask for it. Someone probably thought this was clever.
Copy link to clipboard
Copied
I have found the solution to this.
1. Install the Generator Config panel available for download here:
https://github.com/adobe-photoshop/generator-assets/wiki/Configuration-Options
2. Make sure you have downloaded the Creative Cloud desktop app, and "File Sync" is switched ON

3. After installing the Config panel, open Photoshop and show the Generator config panel
4. Now, make sure to check ON "Color convert pixels" as well as "Use FLITE trascoder". Then, press "Save" in that same panel.

5. Save your psd file and this will generate the gray RGB pngs in actual RGB mode and not transform them into grayscale!
6. Enjoy your happiness!

Copy link to clipboard
Copied
Thank you so much for this! It was driving me crazy on how to change my default settings. I hate that it takes a gray image and converts it to grayscale, so weird. I did get it to work by naming my layer .png32 but I think that's dumb too. Default is supposed to be 32bit. Well anyways thank you so much for sharing this!
Copy link to clipboard
Copied
Interesting and useful. Thanks for posting.

 AdChoices