• Global community
    • Language:
      • Deutsch
      • English
      • Español
      • Français
      • Português
  • 日本語コミュニティ
    Dedicated community for Japanese speakers
  • 한국 커뮤니티
    Dedicated community for Korean speakers
Exit
0

Stitch panorama and apply "tiny planet" effect (from mavic air)

Community Beginner ,
Nov 22, 2018 Nov 22, 2018

Copy link to clipboard

Copied

Hello everyone!

So, it's a couple days that I'm trying to stitch a 360 panorama and use the polar cordinates filter to make it like a tiny planet.

The photos are from a Dji Mavic Air, a drone for those of you that don't know.

When I shoot the pano, the drone shows it already like a tiny planet, but if I download it on my pc it is like distorted flat panorama. Also, it is in jpeg, the raw files are avaible in another folder but they are not stitched.

I need to stitch them to edit the complete raw image in Lightroom, so I tryied in a couple ways but never got the perfect result.

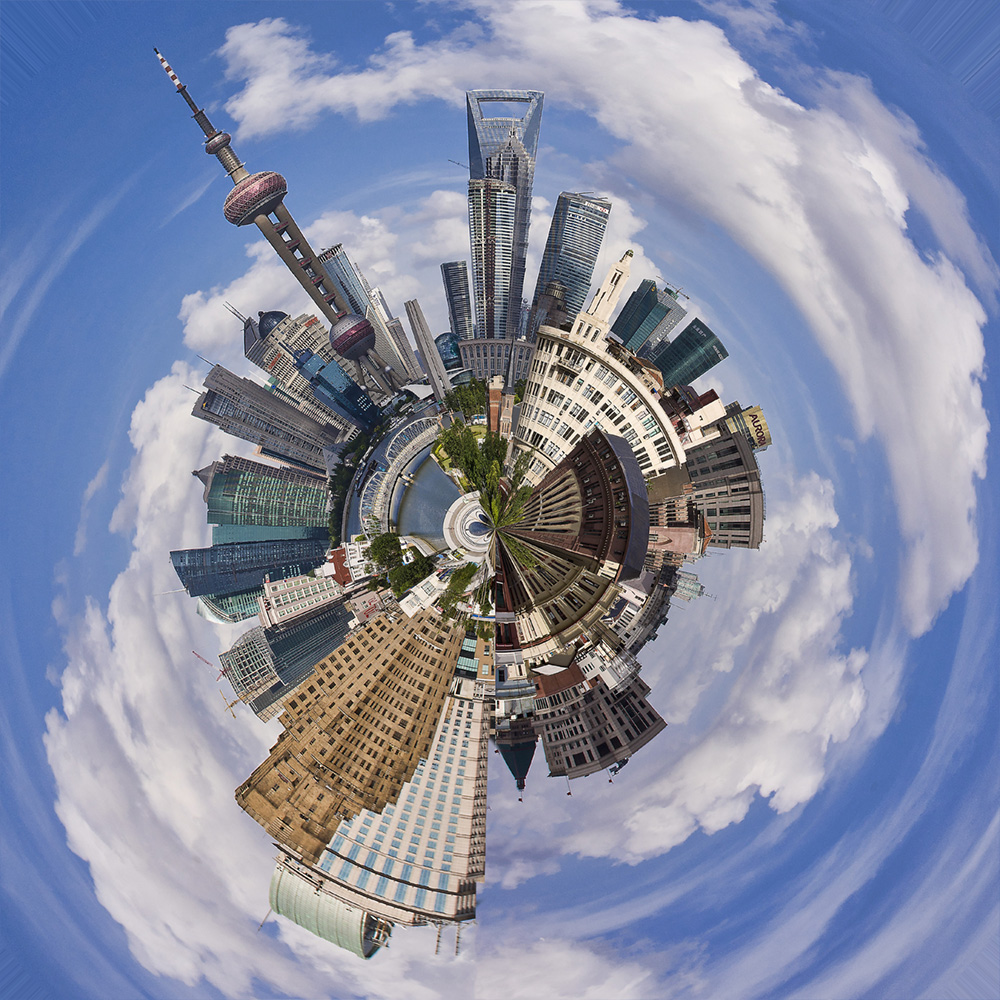
Going in order, here's the image that I want: this is obtained by applying the polar cordinates filter to the complete jpeg image

1.jpg

As you can see, the castle in the center is square, not deformed.

This is the jpeg pano before the effect:

DJI_0065.JPG

So, i took the raw images, imported them in photoshop and stitched the panorama without cropping and with 100% distortion to fill the image

2.jpg

Then I removed the black spot and done a little bit of editing in lightroom just to correct the exposure

3.jpg

Got beck to photoshop, reseized it to 1:1, turned it 180° and applied the polar cordinates filter

4.jpg

As you can see, the castle is deformed and pinched in the center. the line at the top doesn't matter for now....

Then I noticed that the jpeg pano stitched by the drone is in 2:1 proportion, and there is a fake sky added (it can't shoot upwards because of the props), so i reseized the canvas to 2:1 and added more sky, and this is the result:

5.jpg

Then again the same procedure for the filter:

6.jpg

As you can see the result has the same problem, and I cannot figure out how to get rid of it.

In the original jpeg pano there is more of the castle at the bottom, maybe that messes up the proportions then, but I've not been able to stitch the pano and get the correct result.

I also tryied to stitch with Microsoft ICE but it cannot output a raw image that I need.

Can someone help me? If you need I can upload to my drive the raw images...

Thanks in advance

Francesco

Views

4.0K

Translate

Translate

Report

Report
Community guidelines
Be kind and respectful, give credit to the original source of content, and search for duplicates before posting. Learn more
community guidelines
Adobe
Community Expert ,
Nov 22, 2018 Nov 22, 2018

Copy link to clipboard

Copied

I wonder if you are expecting too much from a one click solution?  I managed this with one click (2010 Shanghai) but I  would have experimented with the starting end  points, as well as aspect ratio and vertical position before applying Polar Coordinates.  If you are chasing a more controlled result, then consider taking multiple steps to achieve it.  Think in terms of a composite.

If anyone could give you a better answer, then it would be Russell Brown, who has some excellent, and really quite clever, tips and tricks for processing DJI /Go Pro panoramas.  Think of the links below as a starting point, and work your way through the videos on the side bar.  I thought I knew how to do this stuff, but I learned a ton watching these.

Panorama Stitching Tips and Techniques on Vimeo

Votes

Translate

Translate

Report

Report
Community guidelines
Be kind and respectful, give credit to the original source of content, and search for duplicates before posting. Learn more
community guidelines
Community Beginner ,
Nov 22, 2018 Nov 22, 2018

Copy link to clipboard

Copied

Thanks you for your reply,

By applying the effect to the jpeg pano made by the drone, I obtained the wanted result in one click, and the raw images are exactly the same image only separated in more files. The problem is in the way that Photoshop stitches the image, it seems that the bottom part is cropped and missing, so the solution may be in using another program to stitch. You have the same problem in your image... That's not a wrong thing but it's simply not what I want in this case.

I will try more options for the stitching, or other programs.

Thanks you for the suggestion, I will watch his videos asap.

Hope to make a tutorial when I find out how to do it, as it seems that no one done it.

Francesco

Votes

Translate

Translate

Report

Report
Community guidelines
Be kind and respectful, give credit to the original source of content, and search for duplicates before posting. Learn more
community guidelines
Community Beginner ,
Nov 22, 2018 Nov 22, 2018

Copy link to clipboard

Copied

LATEST

So, messing around with the image I got some results...

As I said earlier, the jpeg pano made by the drone has more of the castle at the bottom, it seems that photoshop crops that.

In photoshop, I opened the raw stitched panorama, then added over it the jpeg pano, with 50% opacity. Then I lined up the raw image with the jpeg, and ended up with a blank space at the bottom. Then proceded as before with the effect: this is the result.

7.jpg

The castle walls are perfect (more or less...), this confirms my therory, but I have that blank space that I have to fill now.

Obviously I cannot take the photo of the castle 90° down and put it in the empty space as the rest is deformed and that image is not..

At this point there are two ways to fix this:

Understand why photoshop doesn't stitch the pano properly and crops this part, and fix this,

or deform the photo of the castle 90° down to cover the hole (which I have not been able to do properly).

MAYBE applying the lens correction to all the pano images before stitching it can fix it. don't know.

Any suggestions?

Votes

Translate

Translate

Report

Report
Community guidelines
Be kind and respectful, give credit to the original source of content, and search for duplicates before posting. Learn more
community guidelines